Sometimes it's the recipes that are simple and easy and fresh that turn out the best. I think it has something to do with getting down the basics, using the stuff that God put on this earth for us to eat. It just does a body good.
I picked this recipe up from a good friend of mine. It's delicious, and better yet, it's good for you. My weight watchers doesn't scream when I eat this. It's so wonderful. Make it today to impress your friends... or better yet, make it after everyone else leaves and the kids are in bed to impress your belly.
This dish is wonderful not only for taste, but for the quick quick prep, and the one dish method. Everything is mixed and baked in the same dish, making clean up a cinch.
Simple Crab Dip
Ingredients:
One package lump crab meat (I go back and forth between the canned true crab meat, and the packaged kinda-fake crab meat that you can find in the refrigerated section of your grocery store. Each is good- no shame in the fake stuff)
Bell pepper, color your choice (I prefer yellow or orange for this one, but really, if you have a favorite, use that one)
Half of a red onion
2/3 cup LIGHT mayo
1/2 cup freshly grated parmesan cheese (if you've never strayed from the parmesan cheese that comes in the little green shaker, this is the time. Find a wedge of it, grate it up, then thank me later, after you've stopped drooling)
Frank's hot sauce
Preheat the oven to 375 degrees (190 C).
Chop the red onion and the bell pepper into pea-sized pieces. Place in a pie dish (or whatever baking dish you choose to use). Chop the crab meat roughly, and toss on top of the veggies. Mix in the mayo and the parmesan cheese, adding a couple shakes of the hot sauce to taste. I love Frank's because it adds flavor as well as heat. I put in about 1/2 Tbsp, and could just pick up the heat, so you can use that as your guide. Not into spice? Add less.
Mix it all up and pop that sucker into the oven for 25 minutes. Don't be afraid of the crispy bits that will form around the sides. Those crispy bits will be your new BFF.
Use your favorite crackers to dip, or pita bread, or a fork. Whatever you fancy.
Friday, February 18, 2011
Wednesday, February 16, 2011
Zucchini Brownies
Please don't judge these by their name. Please. I beg you. I know it's an odd combination, zucchini and brownies together like that. But it works. It so wonderfully, completely, magically works. The zucchini takes the chocolate to a whole new level. It's like those couples that you know, that are on complete opposite spectrums of What It Is To Be Human, and yet, together, they are a wonderful cohesive item. They compliment. That's what these brownies are. So just make them.
And then eat them.
But... if you want proof they exist, be quicker with the camera than I was.

Zucchini Brownies
Ingredients:
3 cups flour
4 Tbsp cocoa
1 tsp baking soda
1/2 tsp salt
1 tsp cinnamon
1 C oil (vegetable or canola... no olive please!)
1 3/4 C sugar
2 eggs, slightly beaten
1 tsp vanilla extract
1/2 C buttermilk (or you can make your own buttermilk, 1/2 C milk with 1 tsp lemon juice added)
2 C peeled, grated zucchini (cheese graters work marvelously for this!)
shortening for greasing the pan
Chocolate chips (any variety, the mini ones works well, and the dark chocolate ones add a great flavor)
Preheat the oven to 350 degrees (175 C).
Sift the flour, cocoa, baking soda, salt and cinnamon together into a medium bowl(this step isn't absolutely necessary if you are short on either time or a sifter, but if you have the means, it does add a great texture to the brownies-- if you choose to omit the sifting, just mix them together with a fork). Set aside.
In a large bowl, beat together the oil, sugar, eggs and vanilla. Add dry ingredients alternately with buttermilk and zucchini. Mix with electric mixer or by hand until well-blended, about two minutes. Pour into greased and floured (or, if you have some left, use cocoa powder instead) 10x15 inch baking pan. Top with chocolate chips. Go crazy here, don't skimp. I can very easily use an entire bag of chocolate chips with these.
Bake for 30-40 minutes, or until a toothpick comes out clean. I think these take a different amount of time each time I cook these... not sure why. This last time, I had them in for about 45 minutes before they were ready. Just keep checking, and if the toothpick comes out covered, pop them in for another 5 minutes, then check again.
These are very very rich, so keep that in mind when cutting them to serve. A little goes a long way!
Monday, January 24, 2011
Irish Car Bomb Cupcakes

I like to fiddle when I cook. I find a recipe that sounds good, and then as I throw it together, I fiddle. I throw some of this and that in there, maybe add an extra veggie or two, see what happens when I add an extra slab of butter, that sort of thing. After a few years of practice, I've gotten pretty good with the fiddling. Most of what I do turns out pretty darn good, or at the very least edible. It makes it hard to relay recipes though, because even if I give you a link, or the page from my cookbook, it may not turn out the same because I usually do some tiny thing different every time I make it.
There are some recipes, though, that are sacred. They are so good on their own that I don't dare do a thing to it for fear of taking away from it. That would be these cupcakes. I am not generally a "sweet" person. I would rather sit down with a bag of chips than a bowl of ice cream any day (which is why, coincidentally, I am on Weight Watchers). But these cupcakes... oooooh these cupcakes. They are divine. In such a naughty, alcoholic kind of way.
This recipe is pretty labor intensive. I've made them three times now, and it's taken me just as long to do it the third go around as it did the first time. They are worth the effort though. From the Guinness chocolate base, to the Bailey's infused ganache (which I have recently been told is Ga-Naaaaaassshhhhh), topped with a melt-in-your mouth Bailey's buttercream frosting. Make these. Drop the book your reading, ignore your children, tell your husband you have a headache. Whatever you have to do.
Here is the recipe, pretty much word for word from a site called Annie's Eats. If and when you have time, browse that site, pull some recipes. Every single thing I have made from her site has been tremendous.
Guinness and Bailey’s Irish Cream Cupcakes
Ingredients:
For the Guinness chocolate cupcakes:
1 cup stout (Guinness)
16 tbsp. unsalted butter
¾ cup unsweetened cocoa powder
2 cups all-purpose flour
2 cups sugar
1½ tsp. baking soda
¾ tsp. salt
2 large eggs
2/3 cup sour cream
For the Bailey’s ganache filling:
8 oz. bittersweet chocolate, finely chopped
2/3 cup heavy cream
2 tbsp. butter, at room temperature
2 tsp. Bailey’s Irish cream
For the Bailey’s buttercream frosting:
8 tbsp. unsalted butter, at room temperature
3-4 cups confectioners’ sugar, sifted
4-8 tbsp. Bailey’s Irish cream
Directions:
To make the cupcakes, preheat the oven to 350° F (175 degrees C). Line two cupcake pans with paper liners. Combine the stout and butter in a medium saucepan over medium heat. Add the cocoa powder and whisk until smooth. Remove from the heat and allow to cool slightly.
In a large mixing bowl, combine the flour, sugar, baking soda and salt. In the bowl of an electric mixer fitted with the paddle attachment, beat together the eggs and sour cream to blend. Add the stout-butter mixture and beat just to combine. Mix in the dry ingredients on low speed just until incorporated. (Obviously, this can be mixed by hand as well. Just be sure not to overmix-- a standard rule when making cake batter.) Divide the batter evenly between the cupcake liners, filling them about 2/3 to ¾ full. Bake until a toothpick inserted in the center comes out clean, about 17 minutes. (If using an oven in the UK, keep an eye on them. I found mine were done at about the 15 minute mark.) Allow to cool in the pan for 5-10 minutes, then transfer to a wire rack to cool completely.
To make the ganache filling, place the chocolate in a heatproof bowl. Heat the cream in a small saucepan until simmering, then pour it over the chocolate. Let sit for one minute and then whisk until smooth. If the chocolate is not completely melted, place the bowl over a double boiler or give it a very short burst in the microwave (15-20 seconds). Add the butter and Bailey’s and stir until combined.
Set aside to let the ganache cool until it is thick enough to be piped. (You can use the refrigerator to speed the cooling process, but be sure to stir every 10 minutes or so to ensure even cooling.) Meanwhile, cut out a portion from the center of the cupcake using the cone method (a small paring knife works best for this). (The cone method involves cutting into the top of the cupcake, making a small circle with a cone shape going into the center. Remove the cone, reserving the very top of it. You'll place these back on the cupcakes after putting the ganache in the middle.) Once the ganache has reached the correct consistency, transfer it to a piping bag fitted with a wide tip and pipe it into the cupcakes. (Or just use a big ziploc bag, cutting a very small corner off.)
To make the frosting, place the butter in the bowl of a stand mixer fitted with the paddle attachment. Beat on medium-high speed until light and fluffy, about 2-3 minutes. Gradually add the powdered sugar until it is all incorporated. Mix in the Bailey’s until smooth. Add more if necessary until the frosting has reached a good consistency for piping or spreading. Frost the cupcakes as desired.
Source: Annie's Eats
Friday, January 21, 2011
Vanilla Berry Jam

This particular jam initially started off as just a blackberry jam, but I had other berries that hit the point of "use or dispose", so those got thrown in there too. Please know that, regardless of what I used, you can use any and all types of berries that you can get your hands on. This makes a pretty small portion of jam, so feel free to add more berries (and likewise sugar) to yours if you need to.
Vanilla Berry Jam
Ingredients:
About three cups of fresh berries (mine were blackberries, strawberries and blueberries)
1/4 cup sugar
1 Tbsp lemon zest
Juice of half a lemon (about 1-2 Tbsp)
Half of a vanilla bean
Directions:
Clean your fruit and cut up if needed. Small berries you can leave whole, but give strawberries a chop or two before throwing them in the mix. Put the berries and the sugar in a medium saucepan over medium-low heat. While that warms up, zest your lemon and throw your zest and juice in with the berries. De-seed half of a vanilla bean (see below) and throw both the seeds and the bean in with the berries; mix well. Cook for anywhere between 30-60 minutes, keeping a close eye on it and stirring occasionally to prevent sticking. Pull off of the heat when it reaches your desired consistency. The longer you leave on the heat, the fewer chunks of fruit you'll have. Before serving/putting away, retrieve both parts of the vanilla bean and discard.
If you have the chance, serve this warm over vanilla ice cream. Drool.

De-seeding a Vanilla Bean:
Vanilla beans are one of those things that should be used more often, but are neglected because of the convenience of vanilla extract. Plus, they are expensive. The flavor they provide is wonderful, and in this jam it adds a lot of sweetness so you can cut out some of the sugar. Since they are so rarely used, I had no idea how to 'prepare' one. So here is a step by step to getting at those lovely little seeds.
Slice a vanilla bean in half and store the unused portion back in its container.

Slice the half bean down the length of it and pull the two halves apart. With the back of your knife, flatten each part by running your knife down the inside. The seeds will collect on your knife as you go. Yum!

Thursday, January 20, 2011
Roasted Tomato Soup
Imagine my husband's surprise when I joined him in England, fresh off the wedding, and cooked my very first house-wifey meal for him (some sort of chicken and rice casserole)... and it was awful. Like, spit out that first bite, dump the rest, and order a pizza awful. So maybe I wasn't a chef. I could do a darn-good PB&J, a great stuffing (out of a box), and a pretty stellar fried-egg-on-toast (otherwise known as a toad-inna-hole in my family). But that was about it.
Fast forward 5 years and 2 kids, and I like to think I've come a long way. I was surprised as anyone to find that cooking and baking were undiscovered passions of mine. It seems each month I discover something new, a new technique, a new ingredient, that spurs me on to create something even more delicious and satisfying.
My plan is to record this journey I am on, by way of recipes that I stumble across as I go. From family, from friends, from the internet, from my head. They will all be here. I hope that I will inspire others to cook, to really get down and dirty in the kitchen. I think a big reason a lot of people choose not to cook is because it can be intimidating. From my experience, things that look like they were the hardest to prepare are often the ones that surprise me with their simplicity. And that's what I want to do with this blog. Break it down, so we can all enjoy some good food-love.
I'll start with a recipe that I just made this afternoon for lunch. It was forwarded to me by my brother, who is making his own leaps and bounds in the kitchen. Cook on, bro. Cook on.

Roasted Tomato Soup
Ingredients:
2 1/2 pounds fresh tomatoes (mix of any kind you want)
6 garlic cloves, peeled
2 yellow onions, sliced
olive oil
salt and pepper
1 quart (4 cups) chicken stock or broth
2 bay leaves
4 Tbsp butter
1/2 cup chopped fresh basil leaves
3/4 cup heavy cream (OPTIONAL)
Directions:
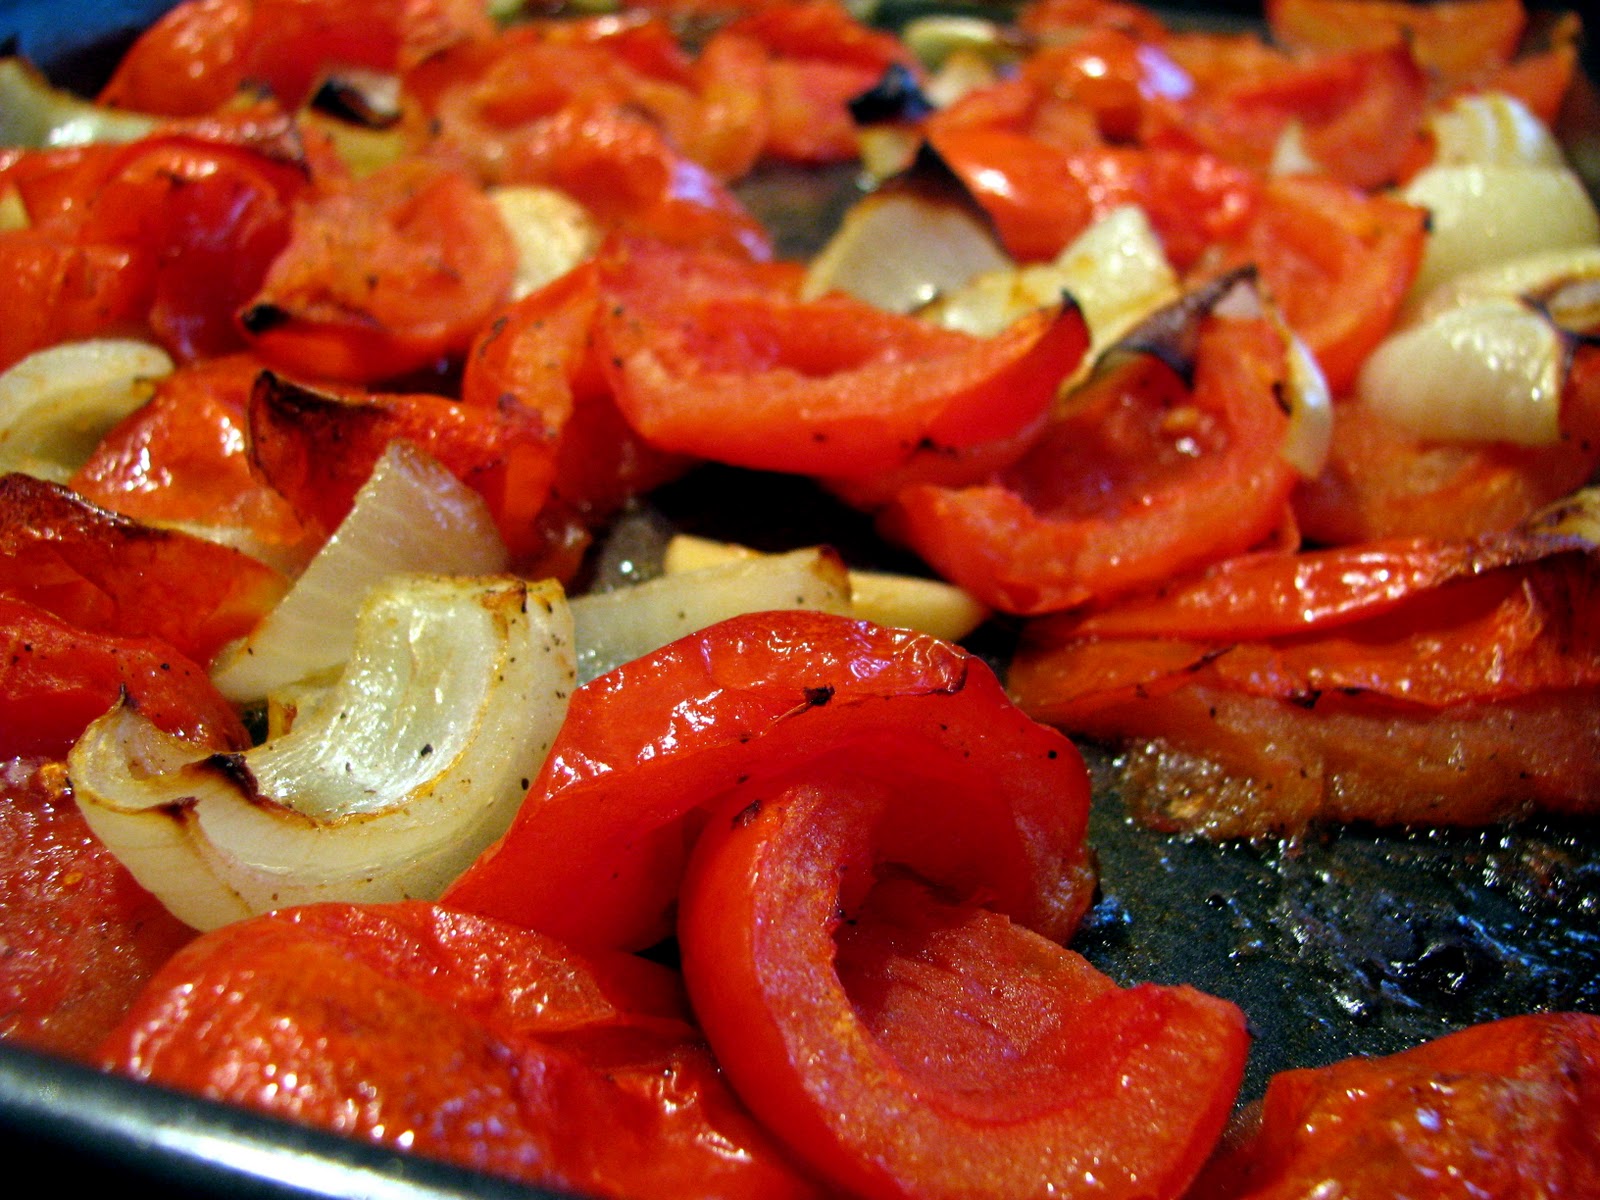
Preheat the oven to 450 degrees.
Cut the tomatoes in half, then in half again. Discard the seeds and the core and toss the tomatoes on top of a baking sheet with your garlic and onions. Season them with salt and pepper, then drizzle enough olive oil on them to give it a nice coat (about 1/4 cup). Mix it all up and put it in the oven for about 25 minutes until there is some nice color on the onions and the tomatoes have wilted down some.

Carefully put the roasted veggies into a large pot and pour in 3 cups of the chicken broth. Add the bay leaves and the butter, then let simmer for about 20 minutes so it reduces by about a third. When it's ready, add the basil leaves, then blend with an immersion blender until smooth. If you don't have an immersion blender, just pour the soup into a regular blender or food processor (in batches if you have to), and blend until smooth. Put the mixture back on the heat. Here is where you have some decisions to make. If you like this consistency, you can stop here. I chose to add about another 1/2 cup of broth to thin it out just a tad. If you choose to, you can also add the cream, but I found that this was creamy enough on its own. I saved my waist-line the trouble of having to carry the extra bulge later and chose to omit it. Serve it with a few shavings of parmesan cheese and a little basil leaf, alongside you favorite 'adult' grilled cheese.
Source: Slightly adapted from FoodNetwork.com (Tyler Florence), courtesy of PhilAlan.
Subscribe to:
Posts (Atom)